


Resources for Warhammer 40,000
collectors

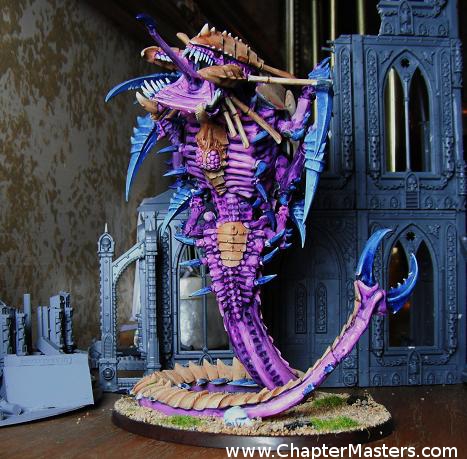
Invasion of Gorgo

This Campaign is fought
between the Salamanders and the Tyranids, although any Space Marine
chapters could be used as a substitute or any other force interested in
saving the citizens of Gorgo prime from becoming part of the Tyranid bio
mass. The campaign is fought over 6 battles. For part-one the aim of the
defender is to save as many of the Gorgo population as possible while
waiting for reinforcements to arrive. For part-two the aim is total
destruction of the opposition.
Other than extensive
interstellar communication problems the Gorgo system had no warning of the
presence of the Hive fleet. Vulkan He'stan's battle barge responded to the
short ranged radio distress call. The last transmission from Vulkan
He'Stan indicated he was returning from the rescue mission at Voss and
suspected Chaos where staging an uprising in Gorgo. The population of Voss
had been battling a chaos uprising. Vulkan had arrived at Voss to find no
evidence of chaos and no knowledge of what had happened over the last few
weeks. However, whole towns and cities appeared to have been wiped from
the map and half the population of the capital had disappeared, whole
dwelling had just been left empty as if half the planet had evacuated.
Suspecting foul play Vulkan remained at Voss for two weeks but finding no
evidence of Chaos activity he despatched a scout unit and his highest
ranking librarian. Upon arrival at Gorgo prime the Salamander astropaths
discovered communication outside the sector to be impossible. Vulkan sent
a battle force comprising of half a company and a number of scout units to
look for evidence of Chaos in the area. Little did they know genestealers
had been roaming Gorgo for weeks. The Salamanders arrived just in time to
get ambushed by the 1st wave of the tyranid invasion.
Battle 1: Drop
Zone
Size
At least 2000 points
Mission
Briefing
The Tyranids are attempting to
cut off all evacuation points. The Salamanders are in the process of
landing on Gorgo. As they land they are ambushed by a Tyranid strike force
attempting to destroy a key landing pad.
Force
organisation
Defender
The Gorgo defenders use the
standard force organisation chart but get 1 extra HQ, 8 Troop and 6 Heavy
Support
To represent half
a company the Salamander player can pick a total of no more than 6
Tactical, Assault or Devastator squads. e.g. 4 Tactical 1 Devastator 1
Assault or 2 Tactical 2 Devastator 2 Assault. Any other units can be taken
from the players codex, subject to the force organisation chart
restrictions above. The salamander player must pick at least three AP3 or
greater weapons in anticipation of Chaos Space Marine
opposition.
Attacker
The Tyranid
player uses the standard force organisation chart but get 1 extra
HQ, 6
Fast Attack and 6 Elite choices. The Tyranid player also gets D3 Mycetic
spores for free.
The planet strike force
organisation charts can be found here.
Table set
up
A building representing a
landing pad is deployed in the centre of the battle field, the Salamander
player then gets to set up all other terrain as they want. The defender
gets D3 bastions for every 2000pts in their army. Each bastion has a
twin-linked lascannon on the roof and a heavy bolter on each wall. As many
aegis defence lines as possible can be used.
Deployment
The defender must deploy at
least 50% of their units within 12 of the centre of the table. All the
defenders reserves arrive on the landing pad. If they can not fit on the
landing pad they should be deployed under or within 6. If extra space is
required they should be deployed within 9 and so on. The defender must
not deploy forces within 12 of any board edge.
Reserves
Defender
The defenders reserves arrive
on a 4+ on turn 2, a 3+ on turn 3 and automatically on turn 4.
Attacker
At least 50% of the Tyranid
players army should start in reserve. The Tyranid players forces move
onto board from any board edge in turn 1. Half of his reserves enter in
turn 2 and half in turn 3. On a roll of 4+ the Tyranid player can chose
which half of his reserves enter in turn 2. If the Tyranid player rolls
1-3 each unit must be rolled for arriving on a roll of 4 or more. In turn
3 all remaining Tyranid players reserves arrive.
Starting the game
The Tyranid player has the
first turn, unless the initiative is ceased on a roll of 6.
Alternately this mission can
be played using the rules from planet strike.
Victory
conditions
This game is fought using the
capture and control scenario, but the Skyshield landing pad is the only
objective.
Game
Length
The game last 6 turns
Campaign
Impact
If the tyranids win this
mission the defender must subtract 1 from all reserve rolls for the rest
of the campaign. If the defender wins this mission they can add +1 to
their reserve roles for the rest of the campaign.
Battle 2: Break
Through
Size
At least 1000pts
Mission
Briefing
Now they realise a Tyranid
invasion is taking place the Gorgo defenders are trying to redeploy forces
to key evacuation and defence locations. The hive mind has seen a critical
opportunity to destroy the defenders forces while they are exposed. In
this mission the defender will try to move a tank column from one of the
short edges of the board to with the other.
Imperial winner gets to set up
heavy support on table before all other units in the final game or Tyranid
win forces all heavy support to start in reserve.
Force
organisation
Defender
Standard Force
origination chart except up to 3 extra marine or guard tanks from any area
of the respective codex can be taken. Note it is permissible and
encouraged to take guard allies for this mission.
Attacker
The
Tyranid player uses the standard force organisation chartbut can only take
heavy support units if they can deep strike or infiltrate, if no heavy
support is taken three extra Fast Attack choices may be
substituted. To
represent the ambush the attacker should ideally take as many deep
striking units as possible.
Table set
up
A road or cleared area should
be placed along the middle of the board between the two short edges of the
board. The rest of the board should be set up as normal.
Deployment
To represent the ambush the
defender must deploy 1st. up to 12 on to the board. The
attacker deploys along the opposite board edge. Reserves follow the
standard rules in the 40K rule book.
Starting the game
The Defender has the first
turn unless the initiative is ceased by the attacker.
Game
Length
The game last 6 turns
Victory
conditions
This game is fort using the
annihilation senario but each tank is worth 2 victory points if destroyed
or moved off from the broad from the exit zone or has arrived in the exit
zone in turn 6.
The Exit zone 12 from the
short edge of the board opposite the defenders deployment zone.
Campaign
Impact
If the defender wins the game
and manages get any of their tanks in to the exit zone they can use them
in mission 5 at no point cost. The tanks must start the game in reserve.
If the attacker wins it is
assumed the tank column did not reach their intended destination. Further
more if any of the defender's tanks suffer a destroyed - explodes result,
the defender must subtract the points value for the tank from their force
size in game 5.
Battle 3: Black
out
Size
At least 1000pts
Mission
Briefing
Having attacked the major supply routes, in the dead of night the
hive mind is now turning it's attention to the
remaining communication posts. If the Tyranids
can take out the last communication posts they will be able to catch the
defenders force off guard and reduce the chance that the defenders calls for re-enforcements will be
received. In this mission the defender will try to ensure the attacker
does not overrun the remaining central communication hub.
The mission follows the
standard Capture and Control mission rules and dawn of war deployment
rules, except that the entire game played with night fight rule. All
objectives should resemble something to do with central communication hub and
are all placed by the defender.
Force
organisation
Standard Force
origination chart.
Table set
up
The rest of the board should
be set up as normal.
Deployment
To represent the ambush the
defender must deploy 1st. up to 12 on to the board. The
attacker deploys along the opposite board edge. Reserves follow the
standard rules in the 40K rule book.
Starting the game
The Attacher has the first
turn unless the initiative is ceased by the attacker.
Game
Length
The game is random
Victory
conditions
The victor is the player who
hold the most objectives at the end of the game.
Campaign
Impact
The winner will be able to
re-roll all roles for reserve and out flank or any other random board edge
deployment method such as out flank for the rest of the campaign, this
does not cover deep-strike.
Battle 4: City Fight
Size
At least 1000pts
Mission
Briefing
The Tyranid invasion is now building momentum.
A large force is approaching the city and a small scouting force is pushing through to
find the weakest defensive points. The Marines hope to delay the fall of
the capital city by forcing the invaders into a the worse possible
offensive position.
Force
organisation
Standard Force origination
chart.
Table set
up
The board should be set up with 1 large
building and many smaller buildings to represent the outskirts of a
city.
Deployment
This is a pitched battle.
Starting
the game
Players role for 1st turn as normal
Game
Length
The Tyranids have six turns to establish a
forward post before the city's army arrives on mass to expel
them.
Victory
conditions
The attacker must have a squad at or above 50%
strength in the defenders deployment zone to win this mission.
In all other cases the defender wins.
Campaign
Impact
The winner will be able to pick board edge and
move up to 3 pieces of terrain in the next battle.
Battle 5: Seize the
Capital
Size
At large as possible
Mission
Briefing
The bulk of the invaders force has now reached
the centre of the city. The Marines can only hope to delay the fall of the
capital by mounting a large counter offensive. This is a time limited game
of annihilation.
Force
organisation
No Force origination
chart.
Table set
up
The board should be set up as a large square
such as 6x6 foot, with larger buildings to represent the city's
centre.
Deployment
The players roll to see who has choice of
deployment and first turn although the winner of battle 4 must choice
their table edge before the roll of is conducted.
Starting
the game
As above the initiative can't be
seized.
Game
Length
A time limit should be agreed after which both players ensure they
have finished the same number of turns. Who ever is wining at this point
is deemed to have beaten back the opposition.
Victory
conditions
The victor is the player who has destroyed the
most enemy units by adding up the points of all the units that have been
completely destroyed.
Campaign
Impact
The winner has won the morel victory of taking
or defending Gorgo Prime. If they have also won 2 of the previous battles
they have won the campaign. If there is not a clear victor at this point the next game should be played. Players may wish to fight battle 6
even if the victor is clear.
Battle 6: Rescue (optional battle)
Size
The attacker gets 1500 points the defender get
750 points. If the Marine player won game 5, D3 ten man imperial guard
squads can be taken from the troop section of the guard codex, representing
the remaining citizens from Gorgo's Capital. These are assumed to be under
command of the Marine Commander.
Mission
Briefing
In the dead of night the Invaders broke though
the Marines defences. The Marines, now reduced to a servilely de-pleated
force, have managed to get a distress call through to their battle
barge. Gunships are on
their way to extract the remaining citizens. The Marines must hold out
until the Gunships arrive
Force
organisation
Standard force
organisation.
Table set
up
The board should be set up as a 6x4 foot table
with a sky
shield landing pad in the defenders deployment zone.
Deployment
The player roll to see who has choice of
deployment and first turn. All imperial guard must be set up within 12 of
the landing pad. The Marine player can not use reserves in this
mission.
Starting
the game
As above.
Game
Length
Random game length.
Victory
conditions
The Marine player wins by having surviving
units at the end of the game.
Campaign
Impact
If the winner of this battle has also won game
5, or has now won a total of 4 games they have won the campaign. If there
is no clear winner the campaign is a draw. An additional game of
Apocalypse should be fought to determine the victor or The
Rescue of Gorgo campaign should be be played.
Have you played any of this
campaign? What did you think? Please post comments to
"webmaster@chaptermasters.com
"

|
|
|
Invasion of Gorgo
This Campaign is fought between the Salamanders and the Tyranids, although any Space Marine chapters could be used as a substitute or any other force interested in saving the citizens of Gorgo prime from becoming part of the Tyranid bio mass. The campaign is fought over 6 battles. For part-one the aim of the defender is to save as many of the Gorgo population as possible while waiting for reinforcements to arrive. For part-two the aim is total destruction of the opposition. Other than extensive interstellar communication problems the Gorgo system had no warning of the presence of the Hive fleet. Vulkan He'stan's battle barge responded to the short ranged radio distress call. The last transmission from Vulkan He'Stan indicated he was returning from the rescue mission at Voss and suspected Chaos where staging an uprising in Gorgo. The population of Voss had been battling a chaos uprising. Vulkan had arrived at Voss to find no evidence of chaos and no knowledge of what had happened over the last few weeks. However, whole towns and cities appeared to have been wiped from the map and half the population of the capital had disappeared, whole dwelling had just been left empty as if half the planet had evacuated. Suspecting foul play Vulkan remained at Voss for two weeks but finding no evidence of Chaos activity he despatched a scout unit and his highest ranking librarian. Upon arrival at Gorgo prime the Salamander astropaths discovered communication outside the sector to be impossible. Vulkan sent a battle force comprising of half a company and a number of scout units to look for evidence of Chaos in the area. Little did they know genestealers had been roaming Gorgo for weeks. The Salamanders arrived just in time to get ambushed by the 1st wave of the tyranid invasion. Battle 1: Drop Zone
Size At least 2000 points Mission Briefing The Tyranids are attempting to cut off all evacuation points. The Salamanders are in the process of landing on Gorgo. As they land they are ambushed by a Tyranid strike force attempting to destroy a key landing pad. Force organisation Defender The Gorgo defenders use the standard force organisation chart but get 1 extra HQ, 8 Troop and 6 Heavy Support To represent half a company the Salamander player can pick a total of no more than 6 Tactical, Assault or Devastator squads. e.g. 4 Tactical 1 Devastator 1 Assault or 2 Tactical 2 Devastator 2 Assault. Any other units can be taken from the players codex, subject to the force organisation chart restrictions above. The salamander player must pick at least three AP3 or greater weapons in anticipation of Chaos Space Marine opposition. Attacker The Tyranid player uses the standard force organisation chart but get 1 extra HQ, 6 Fast Attack and 6 Elite choices. The Tyranid player also gets D3 Mycetic spores for free. The planet strike force organisation charts can be found here. Table set up A building representing a landing pad is deployed in the centre of the battle field, the Salamander player then gets to set up all other terrain as they want. The defender gets D3 bastions for every 2000pts in their army. Each bastion has a twin-linked lascannon on the roof and a heavy bolter on each wall. As many aegis defence lines as possible can be used. Deployment The defender must deploy at least 50% of their units within 12 of the centre of the table. All the defenders reserves arrive on the landing pad. If they can not fit on the landing pad they should be deployed under or within 6. If extra space is required they should be deployed within 9 and so on. The defender must not deploy forces within 12 of any board edge. Reserves Defender The defenders reserves arrive on a 4+ on turn 2, a 3+ on turn 3 and automatically on turn 4. Attacker At least 50% of the Tyranid players army should start in reserve. The Tyranid players forces move onto board from any board edge in turn 1. Half of his reserves enter in turn 2 and half in turn 3. On a roll of 4+ the Tyranid player can chose which half of his reserves enter in turn 2. If the Tyranid player rolls 1-3 each unit must be rolled for arriving on a roll of 4 or more. In turn 3 all remaining Tyranid players reserves arrive. Starting the game The Tyranid player has the first turn, unless the initiative is ceased on a roll of 6. Alternately this mission can be played using the rules from planet strike. Victory conditions This game is fought using the capture and control scenario, but the Skyshield landing pad is the only objective. Game Length The game last 6 turns Campaign Impact If the tyranids win this mission the defender must subtract 1 from all reserve rolls for the rest of the campaign. If the defender wins this mission they can add +1 to their reserve roles for the rest of the campaign. Battle 2: Break Through
Size At least 1000pts Mission Briefing Now they realise a Tyranid invasion is taking place the Gorgo defenders are trying to redeploy forces to key evacuation and defence locations. The hive mind has seen a critical opportunity to destroy the defenders forces while they are exposed. In this mission the defender will try to move a tank column from one of the short edges of the board to with the other. Imperial winner gets to set up heavy support on table before all other units in the final game or Tyranid win forces all heavy support to start in reserve. Force organisation Defender Standard Force origination chart except up to 3 extra marine or guard tanks from any area of the respective codex can be taken. Note it is permissible and encouraged to take guard allies for this mission. Attacker The Tyranid player uses the standard force organisation chartbut can only take heavy support units if they can deep strike or infiltrate, if no heavy support is taken three extra Fast Attack choices may be substituted. To represent the ambush the attacker should ideally take as many deep striking units as possible. Table set up A road or cleared area should be placed along the middle of the board between the two short edges of the board. The rest of the board should be set up as normal. Deployment To represent the ambush the defender must deploy 1st. up to 12 on to the board. The attacker deploys along the opposite board edge. Reserves follow the standard rules in the 40K rule book. Starting the game The Defender has the first turn unless the initiative is ceased by the attacker. Game Length The game last 6 turns Victory conditions This game is fort using the annihilation senario but each tank is worth 2 victory points if destroyed or moved off from the broad from the exit zone or has arrived in the exit zone in turn 6. The Exit zone 12 from the short edge of the board opposite the defenders deployment zone. Campaign Impact If the defender wins the game and manages get any of their tanks in to the exit zone they can use them in mission 5 at no point cost. The tanks must start the game in reserve. If the attacker wins it is assumed the tank column did not reach their intended destination. Further more if any of the defender's tanks suffer a destroyed - explodes result, the defender must subtract the points value for the tank from their force size in game 5. Battle 3: Black out
Size At least 1000pts Mission Briefing Having attacked the major supply routes, in the dead of night the hive mind is now turning it's attention to the remaining communication posts. If the Tyranids can take out the last communication posts they will be able to catch the defenders force off guard and reduce the chance that the defenders calls for re-enforcements will be received. In this mission the defender will try to ensure the attacker does not overrun the remaining central communication hub. The mission follows the standard Capture and Control mission rules and dawn of war deployment rules, except that the entire game played with night fight rule. All objectives should resemble something to do with central communication hub and are all placed by the defender. Force organisation Standard Force origination chart. Table set up The rest of the board should be set up as normal. Deployment To represent the ambush the defender must deploy 1st. up to 12 on to the board. The attacker deploys along the opposite board edge. Reserves follow the standard rules in the 40K rule book. Starting the game The Attacher has the first turn unless the initiative is ceased by the attacker. Game Length The game is random Victory conditions The victor is the player who hold the most objectives at the end of the game. Campaign Impact The winner will be able to re-roll all roles for reserve and out flank or any other random board edge deployment method such as out flank for the rest of the campaign, this does not cover deep-strike.
Battle 4: City Fight
Size At least 1000pts Mission Briefing The Tyranid invasion is now building momentum. A large force is approaching the city and a small scouting force is pushing through to find the weakest defensive points. The Marines hope to delay the fall of the capital city by forcing the invaders into a the worse possible offensive position. Force organisation Standard Force origination chart. Table set up The board should be set up with 1 large building and many smaller buildings to represent the outskirts of a city. Deployment This is a pitched battle. Starting the game Players role for 1st turn as normal Game Length The Tyranids have six turns to establish a forward post before the city's army arrives on mass to expel them. Victory conditions The attacker must have a squad at or above 50% strength in the defenders deployment zone to win this mission. In all other cases the defender wins. Campaign Impact The winner will be able to pick board edge and move up to 3 pieces of terrain in the next battle. Battle 5: Seize the Capital
Size At large as possible Mission Briefing The bulk of the invaders force has now reached the centre of the city. The Marines can only hope to delay the fall of the capital by mounting a large counter offensive. This is a time limited game of annihilation. Force organisation No Force origination chart. Table set up The board should be set up as a large square such as 6x6 foot, with larger buildings to represent the city's centre. Deployment The players roll to see who has choice of deployment and first turn although the winner of battle 4 must choice their table edge before the roll of is conducted. Starting the game As above the initiative can't be seized. Game Length A time limit should be agreed after which both players ensure they have finished the same number of turns. Who ever is wining at this point is deemed to have beaten back the opposition. Victory conditions The victor is the player who has destroyed the most enemy units by adding up the points of all the units that have been completely destroyed. Campaign Impact The winner has won the morel victory of taking or defending Gorgo Prime. If they have also won 2 of the previous battles they have won the campaign. If there is not a clear victor at this point the next game should be played. Players may wish to fight battle 6 even if the victor is clear.
Battle 6: Rescue (optional battle)
Size The attacker gets 1500 points the defender get 750 points. If the Marine player won game 5, D3 ten man imperial guard squads can be taken from the troop section of the guard codex, representing the remaining citizens from Gorgo's Capital. These are assumed to be under command of the Marine Commander. Mission Briefing In the dead of night the Invaders broke though the Marines defences. The Marines, now reduced to a servilely de-pleated force, have managed to get a distress call through to their battle barge. Gunships are on their way to extract the remaining citizens. The Marines must hold out until the Gunships arrive Force organisation Standard force organisation. Table set up The board should be set up as a 6x4 foot table with a sky shield landing pad in the defenders deployment zone. Deployment The player roll to see who has choice of deployment and first turn. All imperial guard must be set up within 12 of the landing pad. The Marine player can not use reserves in this mission. Starting the game As above. Game Length Random game length. Victory conditions The Marine player wins by having surviving units at the end of the game. Campaign Impact If the winner of this battle has also won game 5, or has now won a total of 4 games they have won the campaign. If there is no clear winner the campaign is a draw. An additional game of Apocalypse should be fought to determine the victor or The Rescue of Gorgo campaign should be be played. Have you played any of this campaign? What did you think? Please post comments to "webmaster@chaptermasters.com "
|
|
|